
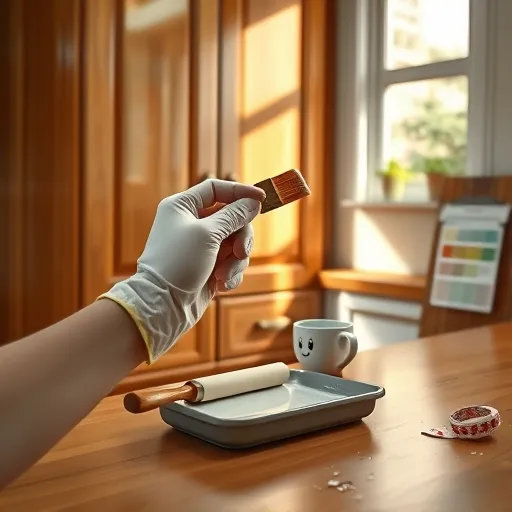
How to Paint Over Glossy Wood Cabinets: Expert Tips and Tricks
Transform Your Kitchen: Expert Tips on How to Paint Over Glossy Wood Cabinets for a Flawless Finish
Your kitchen is the heart of your home—a space where style meets functionality, and where your personality shines through. If your glossy wood cabinets have started to look dull, chipped, or outdated, there's no need for a costly replacement. With the right techniques, you can effortlessly breathe new life into your cabinets, achieving a stunning, professional-quality finish. In this comprehensive guide, we'll explore how to paint over glossy wood cabinets with confidence, ensuring a durable and beautiful makeover that elevates your space.
Why Do Glossy Wood Cabinets Need Special Attention?
Glossy wood cabinets boast a shiny, reflective finish that can be alluring, but this very trait can present challenges when you want to paint over them. The smooth, non-porous surface often causes paint to adhere poorly, leading to potential peeling or uneven coverage. Understanding these hurdles is crucial in determining the best approach for your project.
What Are the Essential Steps for Painting Over Glossy Wood Cabinets?
Achieving a flawless finish on glossy cabinets requires a step-by-step process that ensures proper adhesion and durability. Let's delve into each phase, highlighting critical tips and tricks along the way.
1. Preparation: The Foundation of a Perfect Finish
Starting with a clean, smooth surface is key. Begin by removing all cabinet doors, drawers, hardware, and hinges. Set them aside for painting and reinstallation later.
Clean thoroughly: Use a degreasing cleaner or a mixture of mild soap and water to remove grease, dirt, and residues. This guarantees better paint adhesion.
Sand the surface: Lightly sand the glossy finish with fine-grit sandpaper (such as 220-grit). This step creates a rough texture that helps the primer and paint grip better, overcoming the smoothness of the gloss.
Remove dust: Use a tack cloth or a clean, damp cloth to remove all sanding dust. Cleanliness is essential to a smooth final look.
2. Why Is Priming Critical When Painting Over Glossy Surfaces?
Primers are game-changers in painting projects, especially when dealing with glossy surfaces. They provide adhesion, block stains, and create a uniform base for the paint. Opt for a high-quality bonding primer designed for slick surfaces. Consider options like eco-friendly primers if you're environmentally conscious.
3. How Do You Select the Right Paint for Your Cabinets?
Choosing the appropriate paint is vital for durability and appearance. For kitchen cabinets, prioritize:
Durability: Use a semi-gloss or satin finish for ease of cleaning and resistance to moisture and grease.
Quality: Invest in high-quality, stain-resistant paints designed for cabinetry. Alkyd or oil-based paints provide a smooth, hard finish, but modern water-based options have come a long way for ease of cleanup and low VOCs.
Color: Pick a color that complements your kitchen décor, and consider testing small patches before committing to a full repaint.
4. Is Proper Application Technique Necessary?
Absolutely. Use high-quality brushes and rollers designed for cabinet projects. For the smoothest finish, consider a paint sprayer if you're comfortable with equipment, but a high-quality brush and roller can also do the trick if applied carefully. Apply thin, even coats, allowing sufficient drying time between layers. Sand lightly between coats with a fine-grit sponge or paper for an ultra-smooth surface.
What Common Mistakes Should You Avoid When Painting Over Glossy Wood Cabinets?
Skipping the sanding step: This can cause the paint to peel or flake over time.
Using low-quality primer or paint: Cheap products compromise durability and finish quality.
Piling on thick coats: Thick layers can cause drips, uneven textures, and longer drying times.
Not allowing adequate drying time: Rushing the process can lead to imperfections and reduced adhesion.
How Can You Ensure a Long-lasting Finish?
Patience, quality materials, and proper technique are your best allies. Once your cabinets are painted, avoid heavy usage or cleaning for at least a week to allow the finish to cure fully. Use gentle cleaning methods with mild soap and soft cloths to preserve your fresh look.
Are There Any Additional Tips for a Flawless Finish?
Consider painting vs. wallpaper as an alternative for accent or decorative effects, but if you're committed to cabinets, the right paint makes all the difference.
For eco-conscious homeowners, explore eco-friendly paint options that are low in VOCs and environmentally safe.
If you're unsure about the process or need professional assistance, consider consulting with specialists to avoid costly mistakes—learn more about hiring a painting company.
How Long Does It Take to Complete the Project?
The timeframe varies depending on the size of your kitchen, the complexity of the cabinets, and whether you're doing it yourself or hiring professionals. Typically, expect to dedicate a few days for preparation, painting, and curing time. Planning ahead ensures optimal results and minimizes disruption.
Can I Update My Kitchen's Look Without Replacing Cabinets?
Absolutely. Refinishing or repainting your cabinets can dramatically change your kitchen's aesthetic without the expense and mess of replacements. The transformation hinges on proper surface preparation, quality primer and paint, and meticulous application.
Is It Possible to Achieve a Factory-Like Finish?
With patience, precision, and the right tools, you can achieve a finish that rivals professional installations. Using techniques like spraying offers a smoother, more uniform appearance, but even brush-and-roller methods, if executed correctly, can produce remarkable results.
Conclusion
Learning how to paint over glossy wood cabinets unlocks endless possibilities to refresh your kitchen’s look, boost its value, and express your personal style—all without a complete remodel. The keys lie in thorough preparation, choosing the right materials, employing proper techniques, and giving each layer the time it needs to cure. Whether you’re a DIY enthusiast or considering professional assistance, mastering these steps will ensure your cabinets become a stunning focal point in your home.
Embark on your kitchen transformation today and enjoy the satisfaction of a beautifully renewed space that reflects your taste and personality.